Pages

Saturday 24 January 2015

How to make a Two-Sided Magnetic (Fabric) Pin Cushion - Tutorial

Magnetic pin cushions are really handy for keeping your pins in one place, the only problem is... they're not made of fabric! Traditional pin cushions are very useful when you have to take a pin without looking (because you're busy working on your quilt...) and you don't want to hurt yourself!
So how about a Two-Sided Magnetic (Fabric) Pin Cushion? On one side of the pin cushion a magnet keeps your pins in place, on the other side you can insert your pins when you need too.


Here is what you need to make a Two-Sided Magnetic (Fabric) Pin Cushion:
  • A flat rectangular magnet (even a old one will do!)
  • 6 pieces of fabric, each one sized at least 1/2" longer and wider than the sides of the magnet. You can use scraps of fabric or a few 5" squares from a charm pack if you like.
  • Pincushion filling;
  • A glue gun
Seam allowances are always 1/4".


Before starting, check your magnet is strong enough to hold pins by placing a piece of fabric between the magnet and some pins. If you can turn the magnet upside down and the pins stay in place then your magnet is strong enough.


Start by cutting two pieces of fabric for the top and bottom of the pin cushion. Each piece must be 1/2" longer and wider than the magnet. 


Then cut four pieces of fabric to make the sides of the pin cushion. The length of each piece of fabric must be 1/2" longer than each side of the magnet. The width of each piece of fabric depends on how thick you want your pin cushion to be. For the pin cushion in the photos the sides are 2 1/2" high (including seam allowances). Sew the four sides together right sides together with a 1/4" seam allowance, making a ring (stopping a 1/4" from each corner).


Now sew the piece of fabric for the top to one side of the ring, stopping again a 1/4" from each corner. Iron the pieces you have sewn together.


Using a glue gun, put a line of glue just around the seam on the wrong side of the top piece of fabric and glue your magnet into place (magnet side towards the fabric). Leave to dry.


When the glue is dry, turn the pin cushion with the magnet underneath and sew the top piece of fabric and the fabric ring right sides together (always stopping 1/4" from each corner). Leave an opening on one of the long sides for turning the fabric right side out. The opening must be at least as long as the width of the magnet, especially if the magnet is too stiff to bend through the opening.


Turn right side out, using a chop stick (this is my favourite tool but you can use any other blunt pointed tool) to help you turn the points out. Stuff with pincushion filling and hand sew the opening closed. The magnet will make the base of the pin cushion flat and heavy enough, so you won't need to use crushed walnuts as a filling. 

And here it is, your finished Two-Sided Magnetic (Fabric) Pin Cushion!


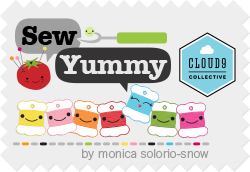
The fabric used for the Two-Sided Magnetic (Fabric) Pin Cushion is Sew Yummy by Monica Solario-Snow for Cloud9 Fabrics. I was so very lucky to win a set of 5 inch squares of this fun fabric from Quilt Taffy. Don't miss Quilt Taffy's blog because they have lovely posts and weekly giveaways of wonderful fabrics!

Sew Yummy!

P.S. Remember there is a magnet inside your pin cushion: iron only with a very low temperature so you don't melt the magnet and don't put the pin cushion near any devices that can be damaged by magnets!


We are joining this year's Finish-Along at Adrianne's On the Windy Side with our Two-Sided Magnetic Pin Cushion. Our original list for Q1 is here, so that's one ticked off!

2015 FAL at On the Windy Side

Follow on Bloglovin


Linky Party 2015

Tuesday 20 January 2015

Sewing: Italian Fashion and European Design

I love writing these posts about how sewing/quilting is influencing design and fashion. There are so many great ideas around. Feast your eyes on these outfits from the Valentino Resort 2015 collection:


valentino-resort-2015
(photo from fashionbombdaily)

Valentino-Resort-2015-rainbow-looks
(photo from laiamagazine)

Aren't they incredible? And don't they remind us quilting fans of something? I love the idea of putting zigzags together with squares, the same colours balancing everything. 


And how about a giant safety pin wall decoration by House Doctor, you can also use to keep your ribbons in order?! They come in different sizes. Ella gave me one as a present and it's already hanging on the wall over the fireplace. So fun!


Safety pins by Cox & Cox #workspace #storage #decoration #desk

Take a look at these Button Hooks by HK Living, Holland. My favourite is the natural wood one with white leather "thread". OK, I admit I bought myself one in the sales!

Fruen fra Trondheim: HK Living 2012


And how about some stunning 3D wall decoration flowers by MIHO Unexepected Things, Italy. Crafted from MDF in Germany, each flower arrives in a flat pack you can easily put together. There's some tweed and what looks like English Paper Piecing in there!

Winter Garden
(photo Zuloh)


If you'd like to look at some more Fashion and Design ideas influenced by sewing, have a look here, here and here!

P.S. None of the above are affiliate links, by the way. They are all products I like. If anyone wants to give me a Valentino outfit for free, I'm not saying no though! The links are to give credit to the creators of the designs.


Follow on Bloglovin


Thursday 15 January 2015

Log Cabin Blocks + Pin Cushions + Quilts = FAL Q1

The equation in the title should result in some finishes for Q1 of 2015! So here is my Finish-Along list:


1. First up are my log cabin blocks for the Scrappy Log Cabin Quilt-A-Long on Instagram. Check out this tag on Instagram: #scrappylogcabinqal to find out more. This project has to be finished by the 15th of February. You can find us on Instagram here: ellaandnesta


2. Pin cushion project: small but fun. It has nothing to do with the pin cushion in the photo. The miniature watering can was a Christmas present from a colleague. I liked looking at it so much I decided to transform it into a pincushion so it has a good reason for sitting next to my sewing machine! Anyway, I have another pin cushion in mind for my second proposed finish. I admit it, I love making pin cushions! Have a look here, here and here and you'll see what I mean!


3. Twin quilts for my daughters using Cardigan Girls panels for Timeless Treasures. I would like to make them for Spring so they can be used when it starts getting warm. This project is also in my 2015 Sewing Goals list.


4. The C+S EPP Star is travelling every day with me to work in the car, hoping to be finished by the end of the month. In the meantime it's just getting dusty! This goal is in my A Lovely Year of Finishes list.


Adrianne at On the Windy Side is hosting this year's Finish-Along. I can't believe how many are joining in! A lot of brilliant projects to check out!

2015 FAL at On the Windy Side

Follow on Bloglovin

Linky Party 2015


Wednesday 7 January 2015

Starting with a Star: January 2015 - A Lovely Year of Finishes

After reading my blog friend Adrienne's post at Chezzetcook Modern Quilts about A Lovely Year of Finishes, I decided to join in the fun. If I manage to finish half the number of projects Adrienne accomplished in 2014, then I will be super satisfied with myself!

I'm starting the year with this WIP:

At the moment it's a EPP C+S Star (that reads like some maths equation, but you know what I'm talking about, quilty language...). I went to look at my post on Instagram to see how long ago I started making this and it was SEPTEMBER! I couldn't believe my eyes, that long ago?! 


I'm joining a Lovely Year of Finishes over at Fiber of All Sorts to hopefully transform this Star into a finished project that I've been wanting to make since September. It's not a quilt, it's not a trivet. Let's say it's a decoration. I have a question: how would you hand quilt/machine quilt the star? Would you quilt it just around the edge, just around the central hexagon or do you have any other suggestions? Thank you for any help you can give me.

Take a look at Adrienne's (at Chezzetcook Modern Quilts) beautiful quilts They are all projects she entered and finished for a Lovely Year of Finishes. Her work really inspires me.

You can join A Lovely Year of Finishes at Fiber of All Sorts or Sew Bittersweet Designs

A Lovely Year of Finishes

Follow on Bloglovin


Sunday 4 January 2015

Happy New Deer Banner and Sunday Stash

As a present to myself (!) for Christmas I got a wonderful bundle of fabric: Indelible by Katarina Roccella for Art Gallery Fabrics. This collection is incredible. Now I have it in my hands (thanks to the fantastic service at Westwood Acres), I must admit it is even better than it looked in the photos I had seen! This is the first project I've used it for: 

Happy New Deer Banner! 


It's an excuse, of course, for saying Happy New Year to you all and sending you a smile! 


I was thinking of adding a real crochet doily but then I found this scrap of trim in a bag of vintage fabric my Mum gave me. The scrap was probably part of a long lost blouse and the pleats are all hand sewn.


I am happy to notice that this little banner fits in well with goal number four I set myself for 2015. A good start!


And here is the lovely bundle in it's full glory (minus the fabric I used to make the banner!)


I now have my eye on Katarina Roccella's new collection: Recollection for Art Gallery Fabrics. I'm very curious to see how quilters are going to use it. The different styles of patterns and scales of the fabrics are a sign of how different trends coexist in today's quilting.


Joining the Sunday Stash link up over at Molli Sparkles!

Molli Sparkles


Follow on Bloglovin